The Ultimate Beginner's Guide to Building a Custom PC
Learn the parts, tools, and steps to build a custom PC—from picking components to cable management, first boot, and troubleshooting—on any budget.
Planning Your Build
Building a custom PC starts with clear goals and a realistic budget. Decide whether your priority is smooth gaming, fast content creation, quiet home office performance, or a balanced all rounder. From there, list essential parts: CPU, GPU, motherboard, RAM, storage, power supply, case, and cooling. Consider the form factor you want, since ATX, micro ATX, and mini ITX influence size, expansion options, and airflow. Map your desk space and think about cable routing, noise, and dust control. Plan for compatibility by matching the CPU socket, chipset features, and memory support. Sketch an airflow path with cool air intake at the front or bottom and warm air exhaust at the top or rear. Create a tool checklist: Phillips screwdriver, zip ties, thermal paste if your cooler does not include it, and a small flashlight. Set expectations for future upgrades, leaving headroom in your PSU and free drive bays or slots. A thoughtful plan reduces surprises and guides every purchase.
Choosing Components
Every component shapes performance, reliability, and acoustics. The CPU handles general computation; look for strong single core speed for lightly threaded tasks and ample cores for rendering, compiling, or multitasking. The GPU drives visuals; choose a model that matches your resolution and refresh goals rather than chasing the most expensive option. Pick a motherboard with the correct socket, robust power delivery, and the I O you need, such as multiple M.2 slots, USB variety, and networking. For RAM, prioritize capacity for your workload and run matched modules in dual channel for bandwidth; speed and timings can help, but stability matters most. For storage, an NVMe SSD delivers snappy load times, while a larger SATA SSD or HDD can handle archives. Select a PSU with clean power, enough wattage plus headroom, and a reputable efficiency rating. The case should balance airflow, dust filtration, noise, and aesthetics, with room for radiators or tall air coolers.
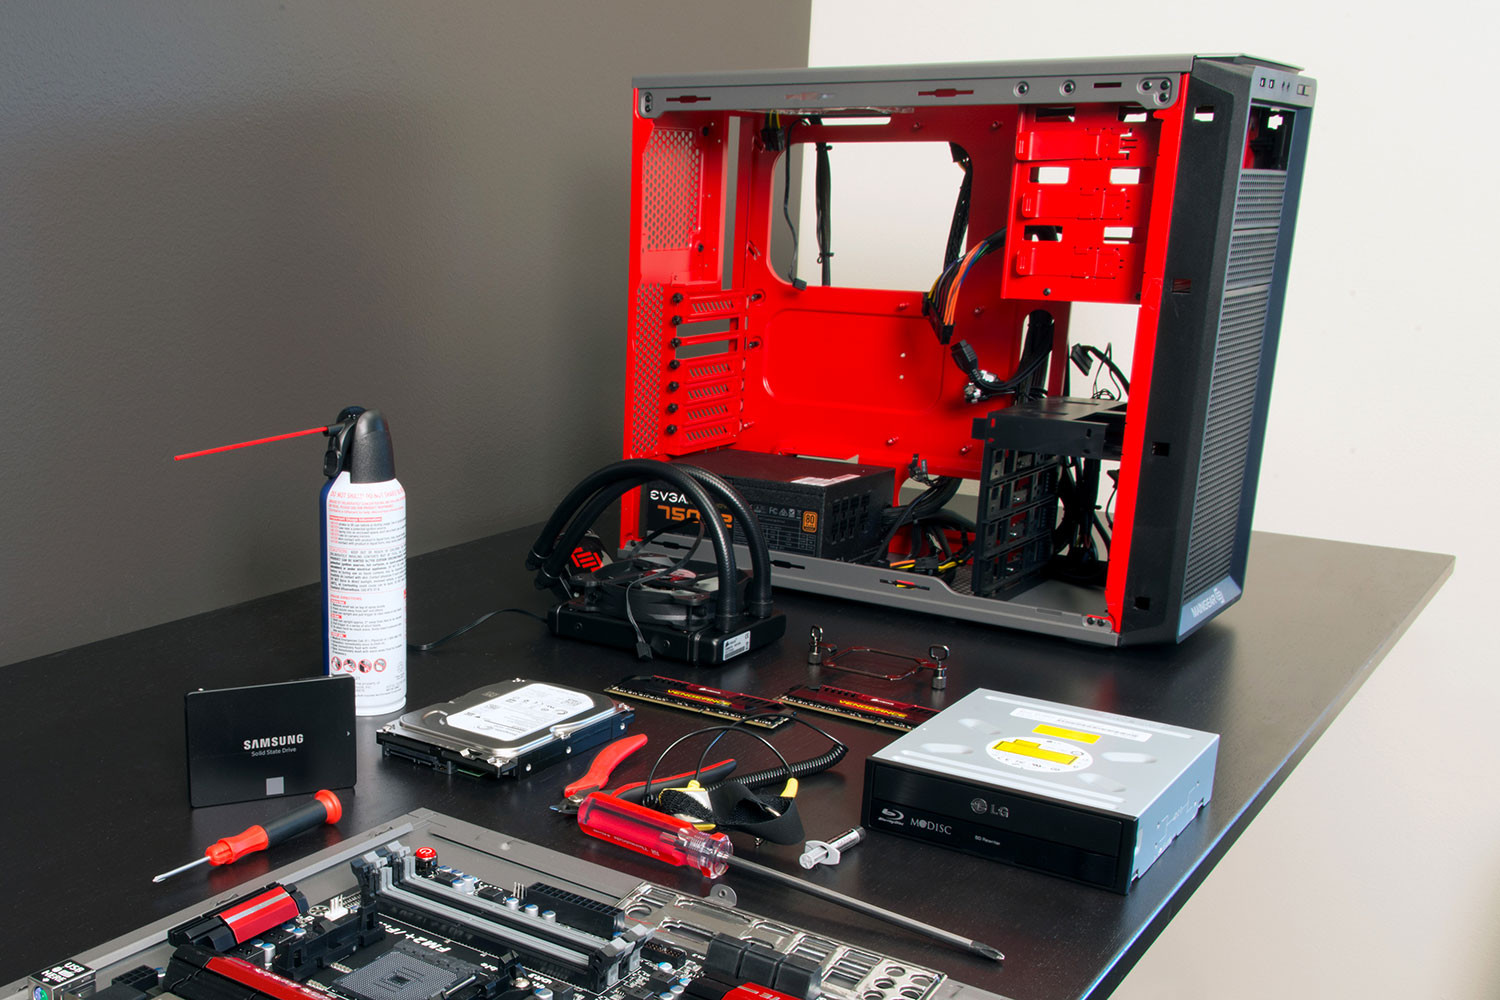
Preparation and Tools
Set up a clean, well lit workspace with a non conductive surface and small containers for screws. Ground yourself regularly to reduce static. Unbox and verify each part before assembly. Begin on the motherboard outside the case: open the socket, align and seat the CPU carefully, add a pea sized dot of thermal paste, and mount the cooler according to its pattern. Install RAM in the recommended slots for dual channel, clicking latches fully. Insert M.2 SSD drives with the proper standoffs and heatsinks. Pre route modular PSU cables you will need, such as 24 pin, CPU EPS, PCIe, and SATA, so cable management is easier later. Review the case manual for standoff locations and front panel connectors. Plan fan orientation for front bottom intake and top rear exhaust to maintain directed airflow. Keep manuals nearby; diagrams for pin headers, cooler brackets, and storage mounts save time and prevent mistakes.
Assembly and First Boot
Install case standoffs to match the motherboard form factor, press in the I O shield if required, and lower the board into place, tightening screws diagonally until snug. Mount the power supply with its fan facing a filtered intake when possible. Connect the 24 pin and CPU EPS power leads, then tidy routes behind the motherboard tray. Seat the GPU in the top full speed PCIe slot and secure it with case screws; attach the correct PCIe power connectors. Add 2.5 inch or 3.5 inch drives with the appropriate cables. Hook up front panel connectors for power, reset, audio, and USB, consulting board diagrams for correct pin alignment. Confirm fan orientation and plug them into headers or a hub. Before closing panels, perform a test power on; if there is no picture, check the display cable, reseat RAM, verify the CPU power connector, and watch debug LEDs or beeps. Once you see the firmware screen, you are ready for software.
Firmware and Software Setup
Enter the BIOS UEFI to confirm component detection, update firmware if needed, and set your boot order. Enable your memory profile, commonly listed as XMP or EXPO, to run RAM at rated settings. Configure fan curves to balance noise and temperatures; front intake slightly stronger than exhaust often helps maintain positive pressure. If using a NVMe SSD for the operating system, ensure it is the first boot device and that storage modes are appropriate. Install the operating system, then add chipset, graphics, audio, and network drivers from official sources. Use monitoring tools to check temperatures, clock speeds, and voltages. Run short stress tests for the CPU and GPU to validate stability, listening for unusual noises and watching thermals. Consider a mild undervolt for quieter operation if supported. Set power plans and display scaling to your preferences, and create a recovery drive or system image once the machine is stable and tuned.
Maintenance and Upgrades
A well built PC stays fast and quiet with simple habits. Dust filters and fans collect debris; clean them periodically with short bursts of air and a soft brush while the system is off. Watch temperatures during heavy tasks, and adjust fan curves or improve case airflow if readings creep upward. Replace thermal paste on the CPU cooler when performance declines or during major upgrades. Expand storage as projects grow, cloning to a larger SSD or adding a secondary drive for archives. Keep firmware and drivers current, but prioritize stability over novelty. Plan upgrades by identifying bottlenecks, such as RAM capacity for multitasking or GPU horsepower for higher resolutions. Practice good power hygiene with surge protection or a UPS, and back up important files to multiple locations. Dispose of old parts responsibly through e waste channels. With mindful maintenance, your custom PC remains a reliable, high value hub for work and play in the realm of consumer electronics.