How to Calibrate Your TV and Monitor for Better Picture Quality
Improve TV and monitor picture quality with a step-by-step calibration: set brightness, contrast, color, gamma, sharpness, motion, and HDR/SDR.
Foundations of Calibration
Calibrating a TV or monitor means aligning its image to a predictable standard so what you see is faithful, comfortable, and consistent. Start by selecting a neutral picture mode such as Movie, Cinema, or Custom, which typically disables heavy processing and targets a balanced baseline. Learn the core controls: brightness adjusts black level, contrast sets white level, backlight or OLED light drives overall luminance, gamma shapes midtone depth, and color temperature determines the warmth or coolness of whites. Understand panel traits: OLED excels at deep blacks, VA panels offer strong contrast with narrower viewing angles, and IPS panels provide stability off axis. Distinguish SDR from HDR; they require different targets and tone mapping. Match the image to your space by planning a consistent seating distance and angle. Calibrate for how you actually watch, whether that is cinematic content, gaming, or productivity. With these fundamentals, every later adjustment becomes purposeful, repeatable, and easier to troubleshoot.
Prepare the Room and Inputs
The environment shapes perception. Allow the display to warm up so colors and luminance stabilize, then control ambient light. A neutral bias light behind the screen reduces eye strain and improves perceived contrast without washing out blacks. Set the correct input type and range: for PCs, RGB full often prevents crushed shadows, while for typical TV sources limited range may be appropriate. Disable overscan so the image maps pixel to pixel, and confirm resolution and refresh rate are correct. Temporarily turn off heavy processing like dynamic contrast, edge enhancement, excessive noise reduction, and aggressive motion smoothing. Calibrate in the exact mode you plan to use, such as Game Mode for consoles or a cinema preset for movies. If the display has local dimming, pick a moderate setting to avoid pumping during setup. With room lighting, inputs, and processing under control, your adjustments will stick and remain accurate across varied content.
Set Black and White Levels First
Begin with the display's luminance foundation. Use a black-level pattern to refine brightness until near-black details are barely visible without lifting the entire image into gray. Next, adjust contrast with a white clipping pattern so the brightest highlights are as bright as the panel can render without losing fine detail. Treat backlight or OLED light separately from brightness; it sets overall image intensity to suit your room. In darker spaces, lower overall luminance to maintain comfort and preserve shadow depth; in brighter rooms, raise it to overcome glare. If available, tune local dimming conservatively during calibration to avoid false shadow crushing or highlight blooming. For PCs, verify the GPU's output matches the display expectation to prevent black-level mismatches. Revisit black and white levels briefly after other tweaks, since gamma and processing changes can nudge shadow and highlight behavior. Solid black and white foundations make every color and midtone adjustment more precise and reliable.
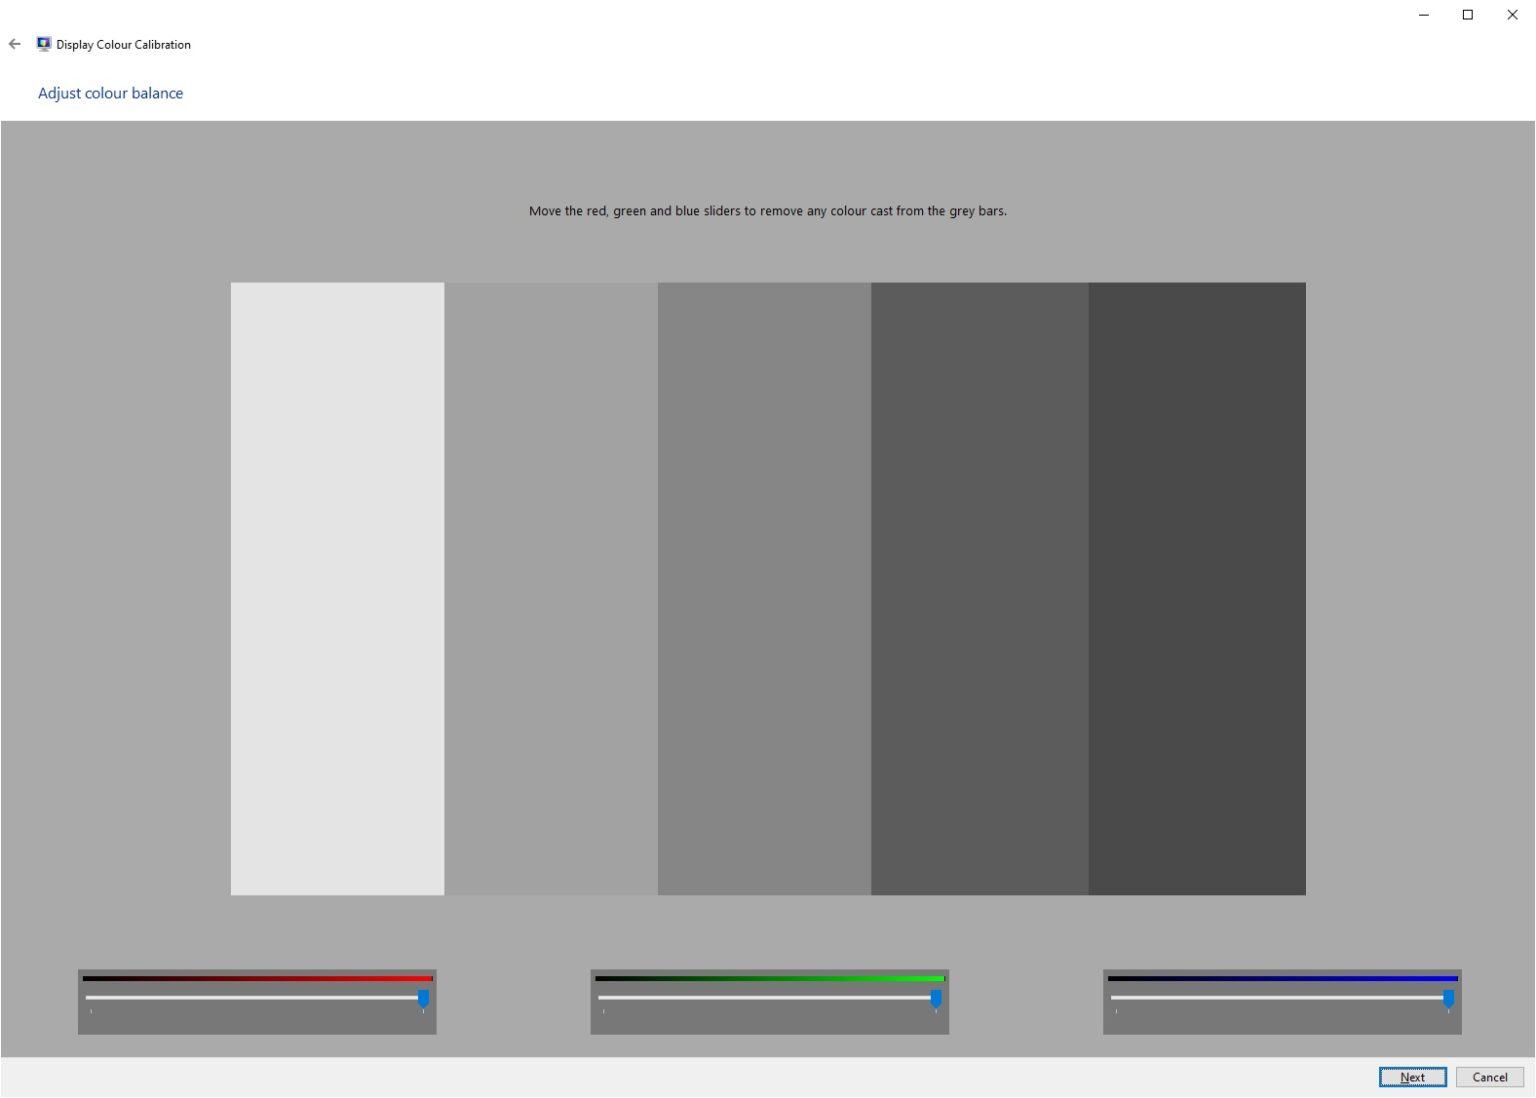
Dial In Color and White Balance
Color accuracy starts with color temperature. Choose a warmer preset usually labeled Warm or Warm2, which tends to align with a neutral daylight reference. If offered, use a simple two-point white balance to nudge the image toward neutral: small adjustments to high-end gain and low-end offset can reduce color casts in highlights and shadows. Next, refine color and tint. With color bar patterns or familiar reference images like skin tones, sky, and foliage, increase saturation until hues look rich but natural, then trim tint to remove green or magenta bias. If your display offers a color management system for primaries and secondaries, make only conservative tweaks unless you have a meter; otherwise leave it at Auto or the standard gamut for SDR content. Avoid using an overly wide native gamut for SDR, which can exaggerate colors. Check a grayscale ramp to confirm smooth, neutral steps. The goal is lifelike color that remains consistent across different scenes and sources.
Optimize Sharpness, Gamma, Motion, and HDR
Artificial detail can harm clarity. Reduce sharpness until edge halos and shimmering disappear on fine text and single-pixel patterns; a low setting often looks most natural. Set gamma for your room: brighter spaces benefit from a slightly lighter midtone curve, while dim rooms profit from a deeper midtone to enhance perceived contrast. For motion, moderate deblur and minimal dejudder preserve clarity without the soap opera effect; disable heavy motion interpolation for films. With HDR, ensure the source and input are HDR-enabled, then choose a tone mapping option that prioritizes accuracy and smooth highlight roll-off over punchy but clipped peaks. Avoid extra contrast boosters that crush details. Verify that color gamut and EOTF-related controls are on an accurate or auto setting for HDR. If your console or PC offers built-in HDR calibration steps, follow them after display-level tuning. Recheck black and white levels in HDR, as tone mapping can shift both ends of the range.
Fine-Tune for PCs and Maintain Consistency
For monitors and desktop use, verify OS and GPU settings. Enable font smoothing tools to improve text, confirm scaling for crisp UI elements, and set the GPU to the correct bit depth and color range. If available, install the manufacturer ICC profile, or create a custom one with a calibration device for meticulous accuracy. Save multiple presets for day and night viewing to match room light changes without constant manual tweaks. For multi-display desks, align brightness, white point, and gamma so windows moved between screens look consistent. Keep screens clean and avoid harsh cleaners that can damage coatings. Revisit calibration after firmware updates or major driver changes. To reduce fatigue, combine a sensible peak luminance with neutral bias lighting and reasonable viewing distance and ergonomics. By pairing careful setup with occasional checkups, you maintain accurate, comfortable image quality for work, gaming, and entertainment across your entire system.